Read Also
Your laptop is not using Windows 10? Want to install Windows 10 but still confused? Calm
Windows is one of the most widely used operating systems today. This operating system is very friendly and easy to use. Supported by many compatible applications and better hardware support than other operating systems.
why do you really have to install Windows 10? Windows 10 is an operating system developed by Microsoft. Windows 10 was released on July 29, 2015 with various advantages.
Armed with sophisticated modern features, Windows 10 is proven to be able to hypnotize its users with a practical appearance. Windows 10 is also recommended for gamers who want to experience the great features of Windows 10.
In this article, we will explain how to install Windows 10 step by step and include pictures to make it easier for readers.
Before that, you must know which PC or laptop meets the minimum requirements to be able to run the Windows 10 operating system smoothly.
PC and laptop minimum specifications For Windows 10:
- PC/laptop already installed Windows 7 or 8
- RAM: Min 1 GB for 32-bit and 2 GB for 64-bit
- Processor: Min 1 GHz or SoC
- Hard Disk: 16 GB for 32-bit and 20 GB for 64-bit
- Display: 800×600
- Graphics Card: DirectX 9 or higher with WDDM 1.0 . driver
- Microsoft Account
- Internet connection
How to Install Windows 10
1. Boot Using DVD/USB
Before you can start the tutorial on how to install Windows 10, you'll need a Windows CD, or if you have an official Windows .iso file, you can create your own Bootable USB/DVD by following this guide: [How to Set Bios to Boot from Flash Drive] [How To Make Bootable Flash Drive].
After having Windows 10 CD or Windows 10 Bootable USB/DVD, insert Windows 10 CD or Bootable USB/DVD into your PC, and restart your PC. Make sure your bios settings are prioritized for booting using USB/DVD first before entering the HardDisk.
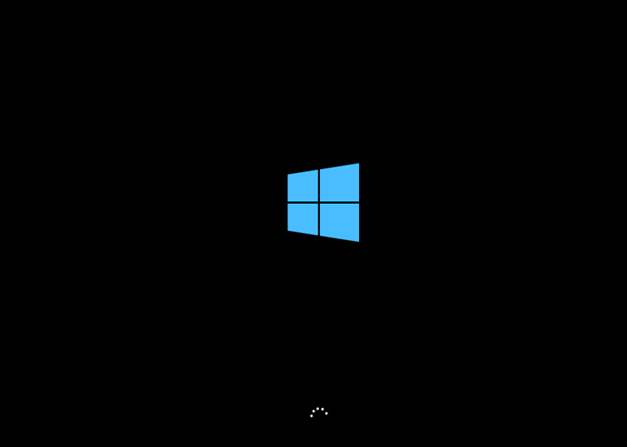
- Here's the initial view of booting Windows 10
2. Configuration before Install
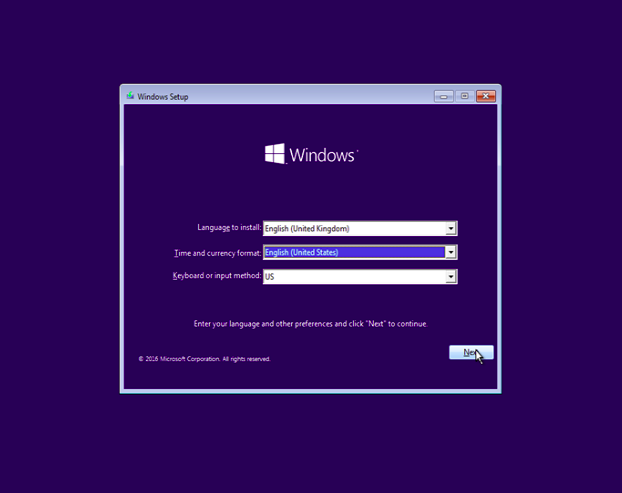
Choose your preferred language, hour and currency format, and keyboard, then click “Next”.
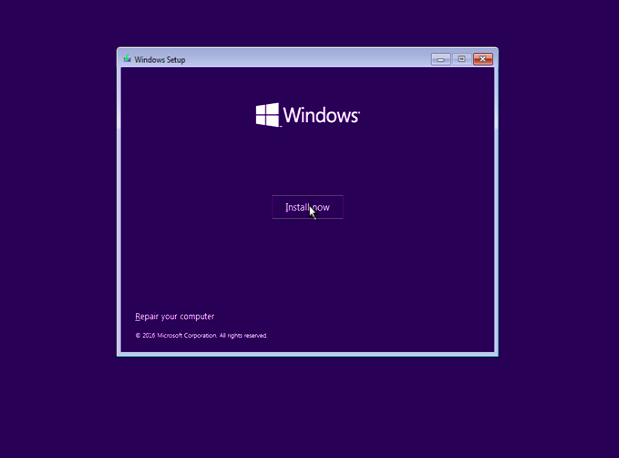
Click "Install now" to continue the Windows 10 installation process.
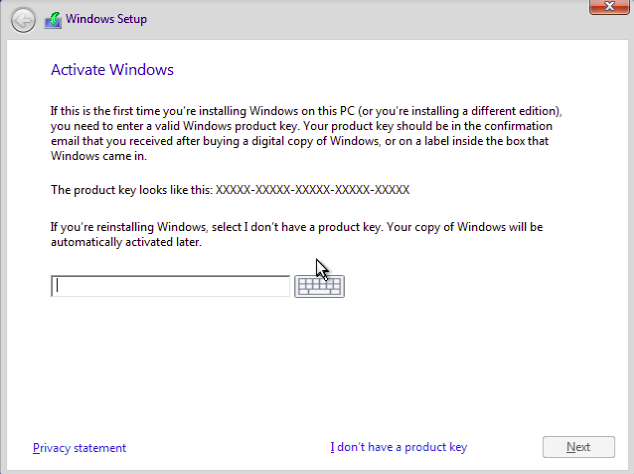
Enter the product key containing 25 characters, then click “Next”.
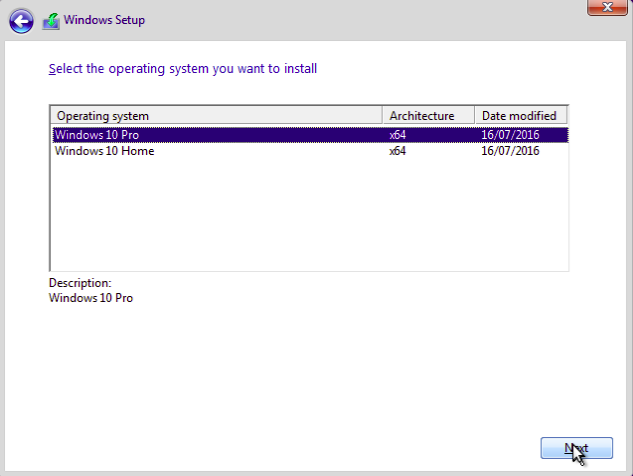
Select the type of windows to be installed, for this article select Windows 10 Pro, click "Next" to continue the installation process.
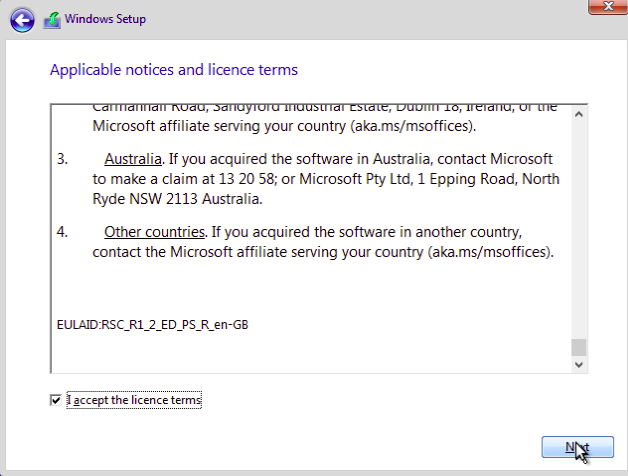
After reading the license terms, click the checkbox below it and then click "Next" to continue the installation process.
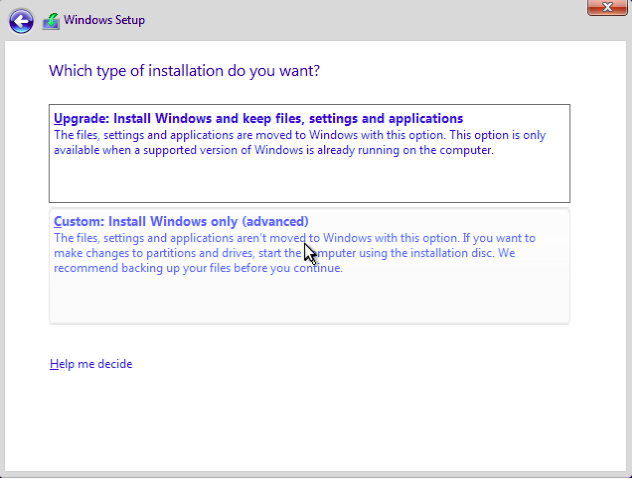
Here there are two options, namely Upgrade or Custom. If you select Upgrade, Windows will automatically use the existing partition, and you cannot change it.
But if you choose Custom, you can specify which partition to use for windows, and you can also create additional partitions to store your data separately from the system.
3. Determining Hard Disk Partition
Hard disk partitioning is dividing the total hard disk storage into several parts, now the part that has been divided is called a partition. Suppose we have a hard drive with a capacity of 150 GB, then we can divide the hard drive into 2 parts, the first part is called Drive C, we can allocate a capacity of 50 GB, on Drive C this is what will be used to store the windows system.
The second part we can call Drive D, which will be allocated the remaining capacity after deducting Drive C, which is 100 GB, in Drive D we can store our data such as documents, photos, or other files.
That way our files and system data are not mixed, so that when Windows is interrupted and we are forced to reinstall, our data is still safe because it is stored on a different partition.
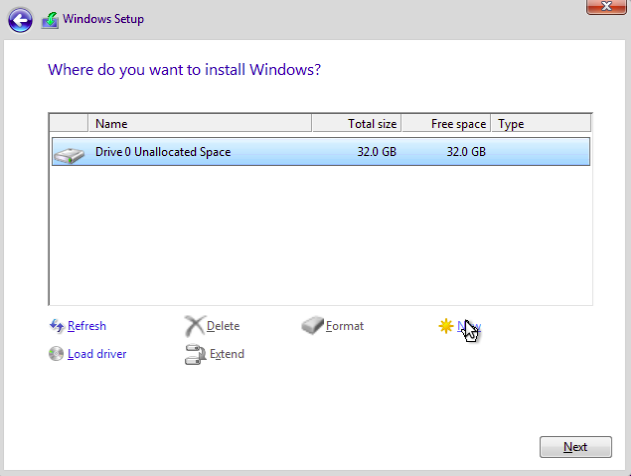
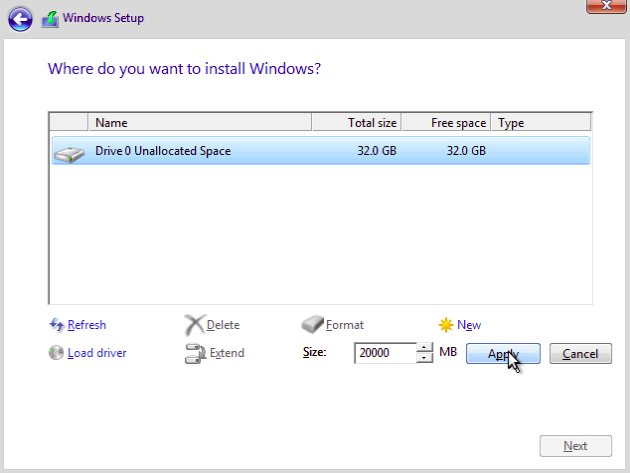
Here we have a 32 GB hard drive, we will divide it into two partitions, one for 20 GB windows system, and the rest for storing data. Click "New" to create a new partition.
Enter the amount of capacity that will be allocated for the partition that we will create, then click "Apply".
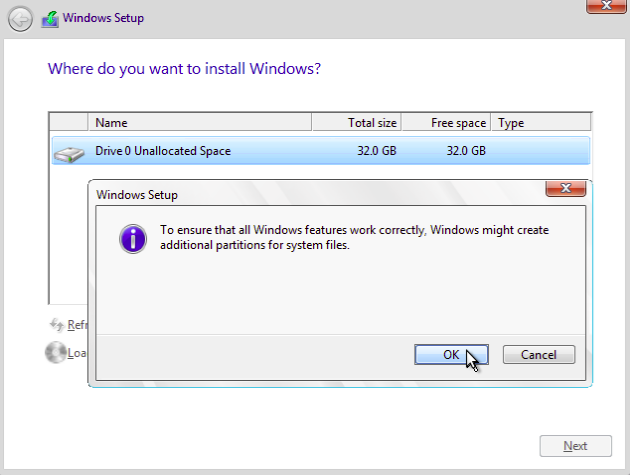
Here windows will create an additional partition so that windows can run smoothly, the additional partition usually contains the bios. Click "OK" to continue.
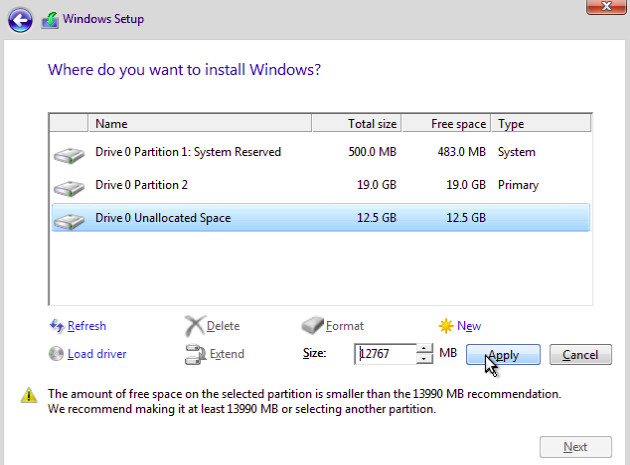
We still have an unpartitioned 12.5 GB hard drive, click on the drive, then click "New" and it will automatically fill up the rest of the unpartitioned hard disk. Click "Apply" to create a new partition.
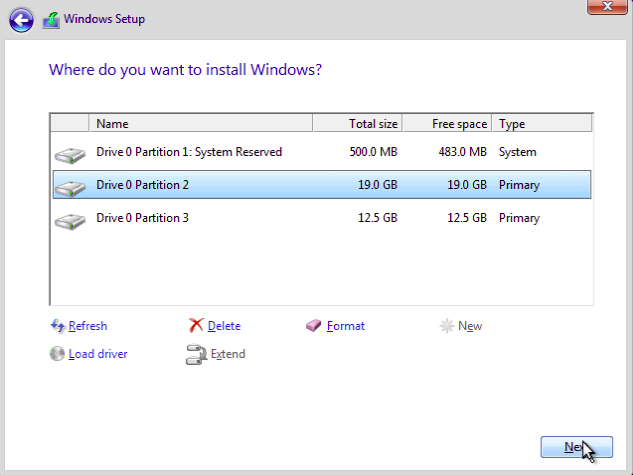
In the end it will form three partitions "Drive 0 Partition 1" will not be visible after we log into windows, "Drive 0 Partition 2" will be Drive C which will be used to store windows system, "Drive 0 Partition 3" will be Drive D which will be used to store our data. Then click "Drive 0 Partition 2" then click "Next" to start the installation process.
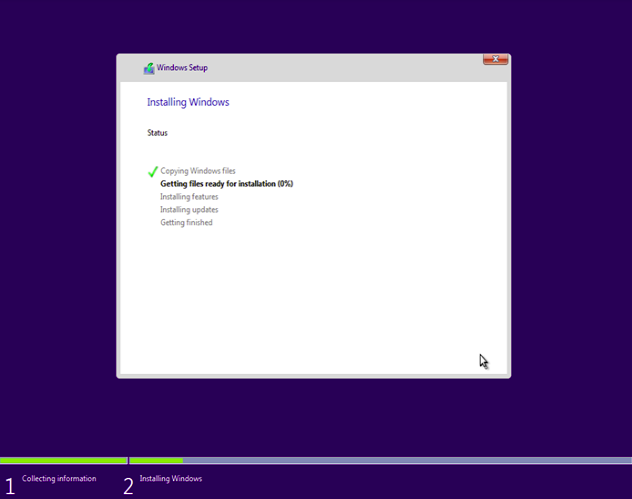
Wait until the installation process is complete, the PC will restart automatically.
3. Personalization
The Windows 10 installation process is complete, next is personalization, which will take us to the user creation process.
Click "Use Expression settings" to show simpler fields.
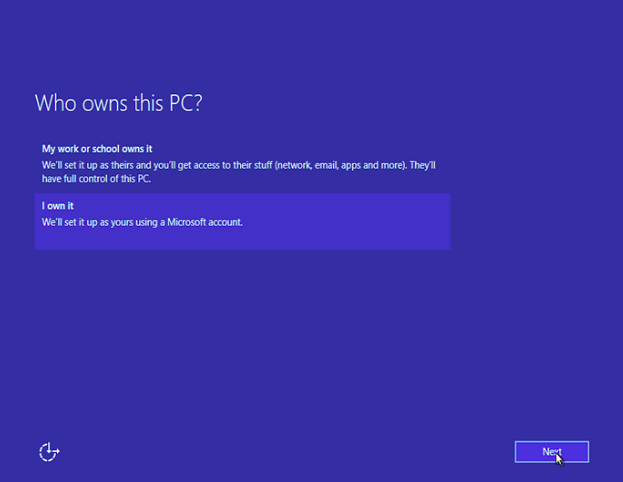
Click “I own it” if the PC you are installing will be for personal use, or you can try “My work or school has it” for work or school, then click “Next”.
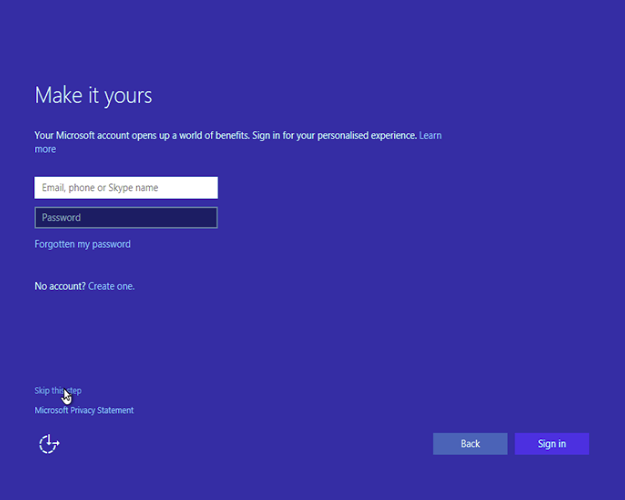
If you already have a Microsoft account, please enter your username and password, but if you don't already have one, you can skip this step by clicking "Skip this step".
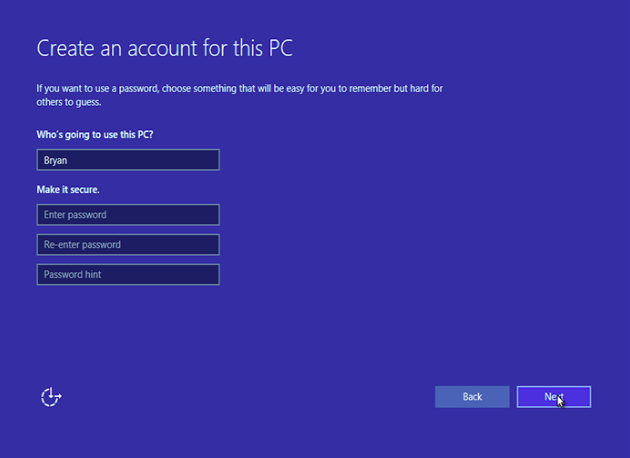
Enter your Username and Password twice, then write "Password hint" which can contain things that can remind you of your password.
